YOUR QUICK GUIDE TO
BUYING A SEASON PASS
(or any other product)
Need help purchasing your pass? No worries, we got you.
Feel free to use a mobile device, but we find using a computer is much easier.
Every pass requires a photo for identification. If you’re buying a military or college student pass, have those IDs available.
On this page:
• Creating an Account
• Selecting products
• Assigning passes
• Liability and agreements
• Billing Information
• Payment Options
• Card information
• Reviewing your order
• Uploading photos
• FAQ
CREATING AN ACCOUNT
Visit store.bluewood.com/register and fill out your account information
SELECTING PRODUCTS
• Click the ‘View Product’ button on the product you want to buy
(Season Pass for this example)
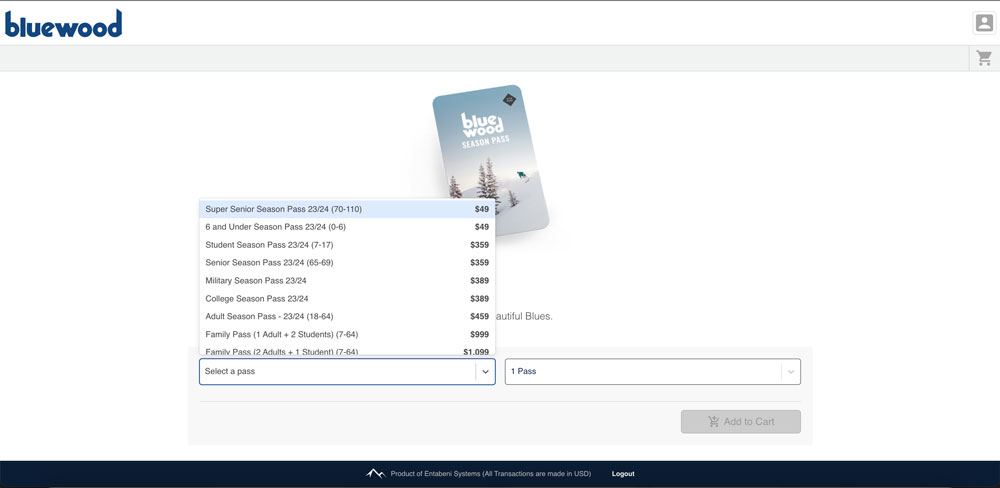
• Select the pass you want from the dropdown menu
• Hit the ‘Add to Cart’ button after you select the pass you want to buy
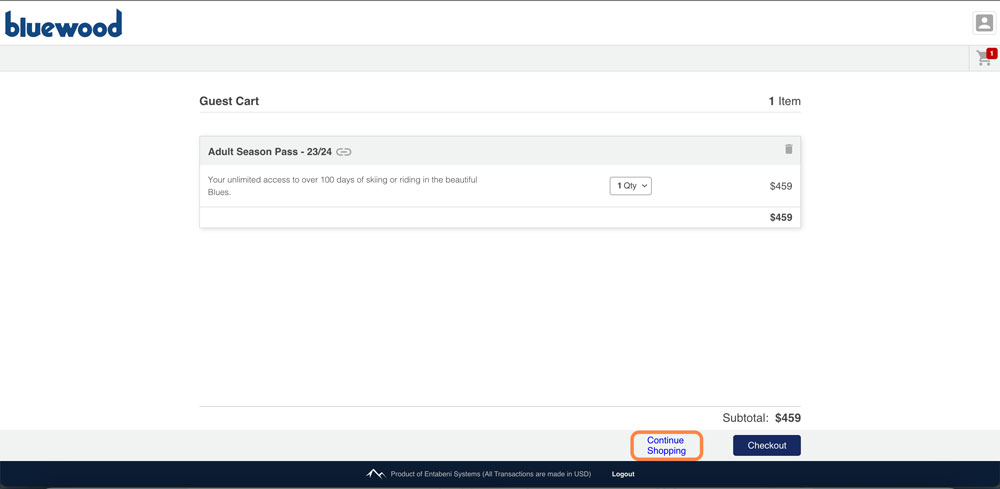
• If you want to buy more than one pass, hit the ‘Continue Shopping’ button and add the rest of your passes
• Once you have all your passes, hit the ‘Checkout Button’
ASSIGNING PASSES
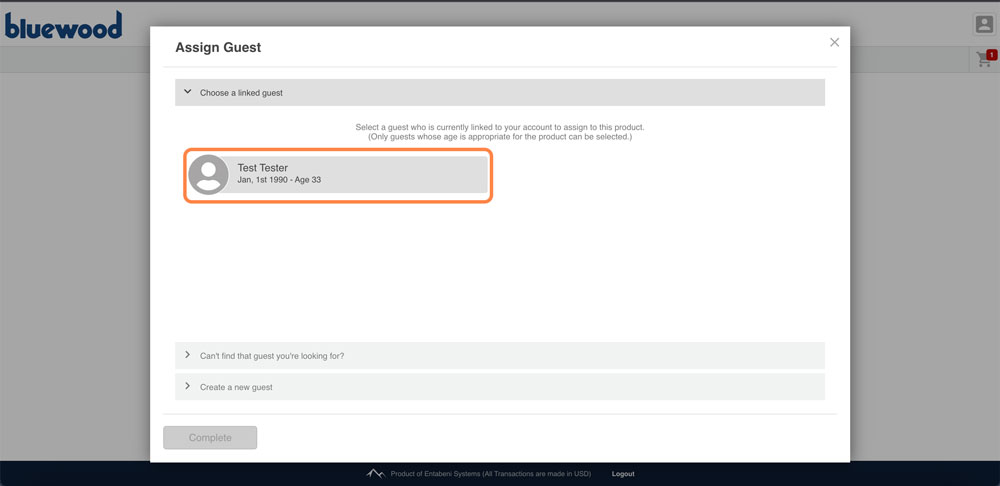
• Hit the ‘Assign Guest’ button
• If you’re only buying a pass for yourself, you can just assign yourself as the user by clicking on your profile
Buying passes for someone else? (Spouse, kid, grandkid, great great grandparents)
• You’ll have to add them as a guest through their customer code or by creating a new guest for them. (Any guest you add will show up in the ‘Choose a linked guest’ dropdown. If a guest is under 18, you’ll be able to sign their waivers after you’ve assigned them to a pass)
• When you’ve assigned guests to your passes, hit the ‘Complete’ button
• After you’ve reviewed the guest names assigned to the passes, hit ‘Continue’
LIABILITY & AGREEMENTS
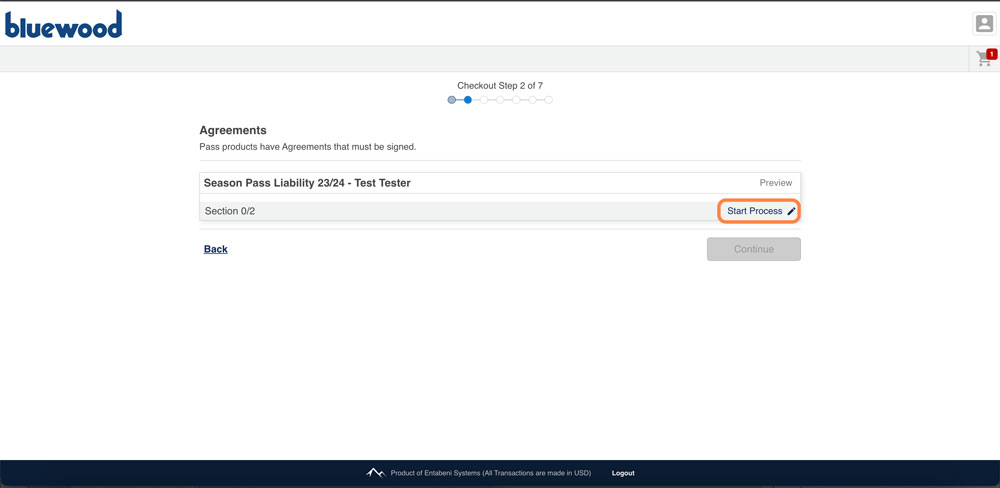
• Click the ‘Start Process’ link
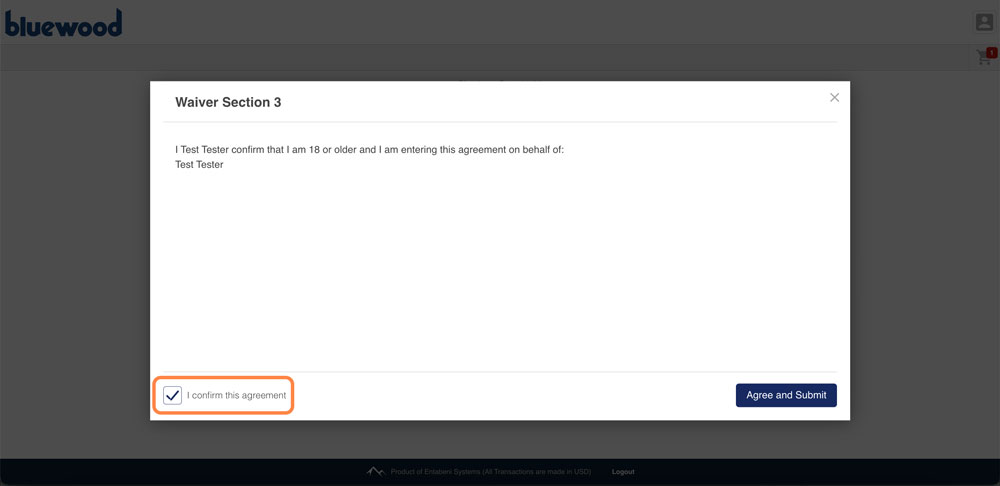
• Hit the ‘Agree’ button on all liabilities you agree with and the ‘I confirm this agreement’ on the last page of the Waiver Section
* If you’re buying passes for anyone over 18, they’ll have to agree to the waivers for themselves. (We’ll email them the link to their waivers)
BILLING INFORMATION
• Enter your billing information
(You can also add a new address if your billing address changes)
• Click ‘Create Address’
PAYMENT OPTIONS
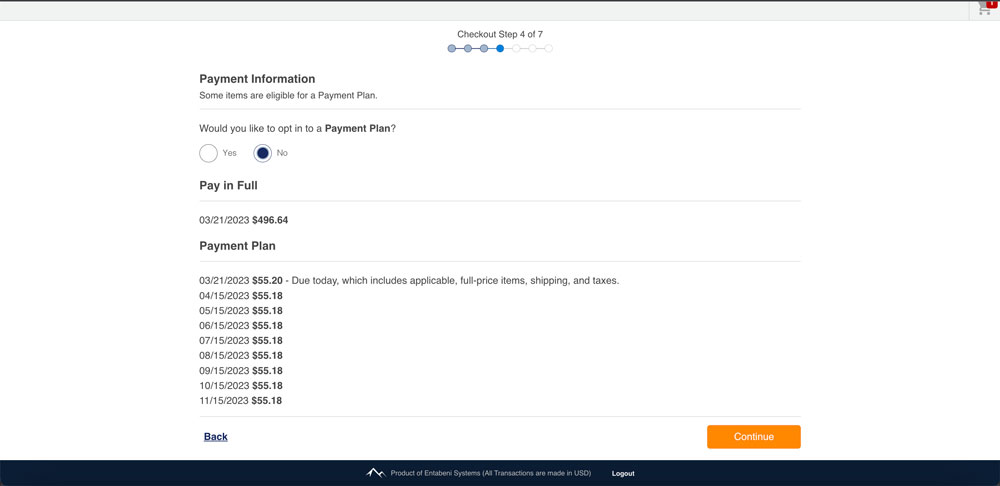
• Here you’ll select between paying for your pass up front or opting for the payment plan
• The payment schedule for your pass will show you exactly how much each payment will be and when they’re due
* If you choose the payment plan, your pass will not work until all payments are made
CARD INFORMATION
This is one of the new BIG features. The card information you include here can be used for anything on the mountain. That means you can use your Pass to buy food, merch, rentals, lessons, or anything else you’d like on the mountain!
(You can always delete or add cards in your account settings)
REVIEWING YOUR ORDER
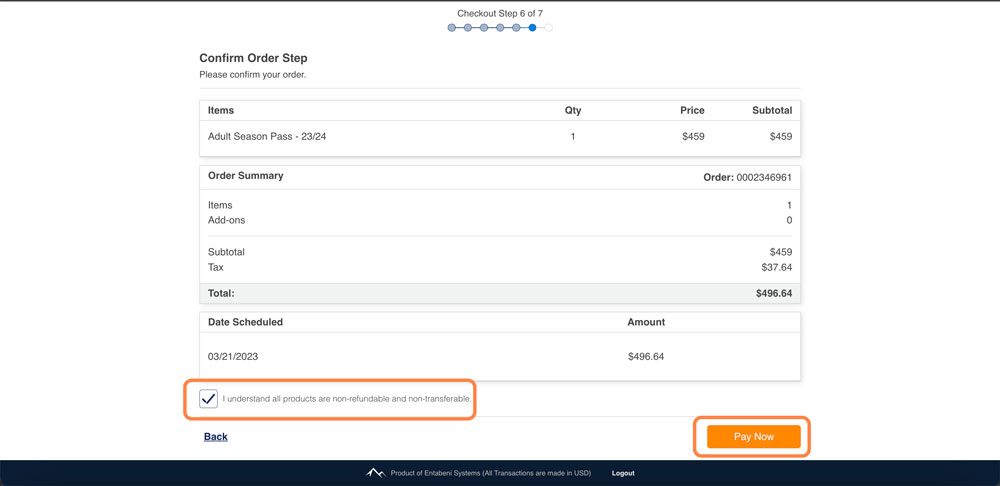
This is your last chance to review your order before paying for your passes.
If your order looks good, check the ‘I understand…’ box and click the ‘Pay Now’ button.
UPLOADING PHOTOS
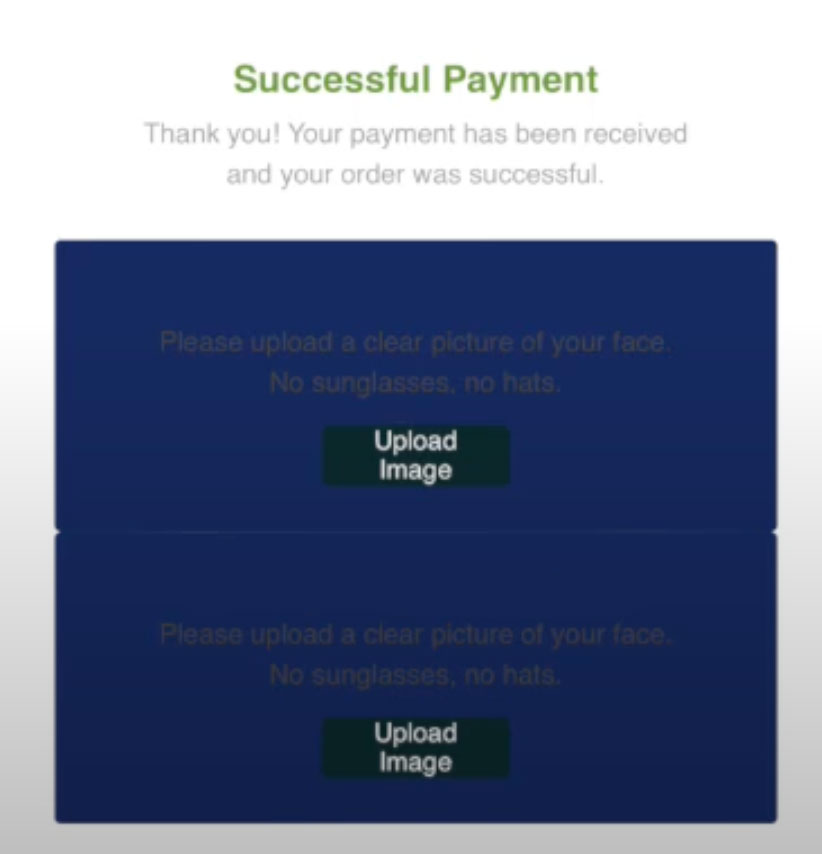
After a successful payment, the last thing you need to do is hit the ‘Upload Image’ button for each of the passes you purchased
(Upload a clear picture of your face. No sunglasses. No hats)
FAQ’s
If you have additional questions, feel free to reach out to us at support@bluewood.com We’d be happy to help you with your purchase process.
